

The rain has finally stopped, but as you pull open the gate to turn your horses out, you are met with a sight that instantly dampens your mood: a churning, treacherous expanse of dark, sucking muck. Your rubber boots sink halfway to your calves with a wet, vacuum-like suction sound. Within seconds, you are losing your footing just trying to cross the threshold, while your horses stand anxiously at the edge, their sensitive hooves trapped in a cold, manure-laced slurry. If this scenario sounds painfully familiar, you are certainly not alone. For horse owners across the globe, managing seasonal wet weather is a relentless, exhausting chore.
Implementing proper horse paddock mud control is not merely an aesthetic choice or a matter of keeping your boots clean; it is a foundational pillar of equine welfare, pasture health, and daily farm management. When turnout areas devolve into deep sludge, the risks multiply rapidly. From chronic skin conditions and hoof rot to structural property damage and physical strain on your own body, unchecked mud creates a cascade of expensive and stressful problems.
For too long, horse owners have relied on temporary, band-aid solutions—dumping random truckloads of gravel directly onto a soggy surface only to watch it vanish into the void by next season. This comprehensive masterclass moves past superficial fixes. We will explore advanced hydrological management, permanent ground stabilization engineering, high-traffic zone protection, and preventative health protocols. Whether you are battling clay-heavy winter ground or relentless autumn downpours, this guide provides the blueprint to reclaim your property once and for all.
II. Understanding the Enemy: Why Paddocks Turn to Mud
To defeat mud, you must first understand the physics of how it forms. Mud is not simply water mixed with dirt; it is the destructive result of soil compaction, organic breakdown, and saturated hydrology working in tandem.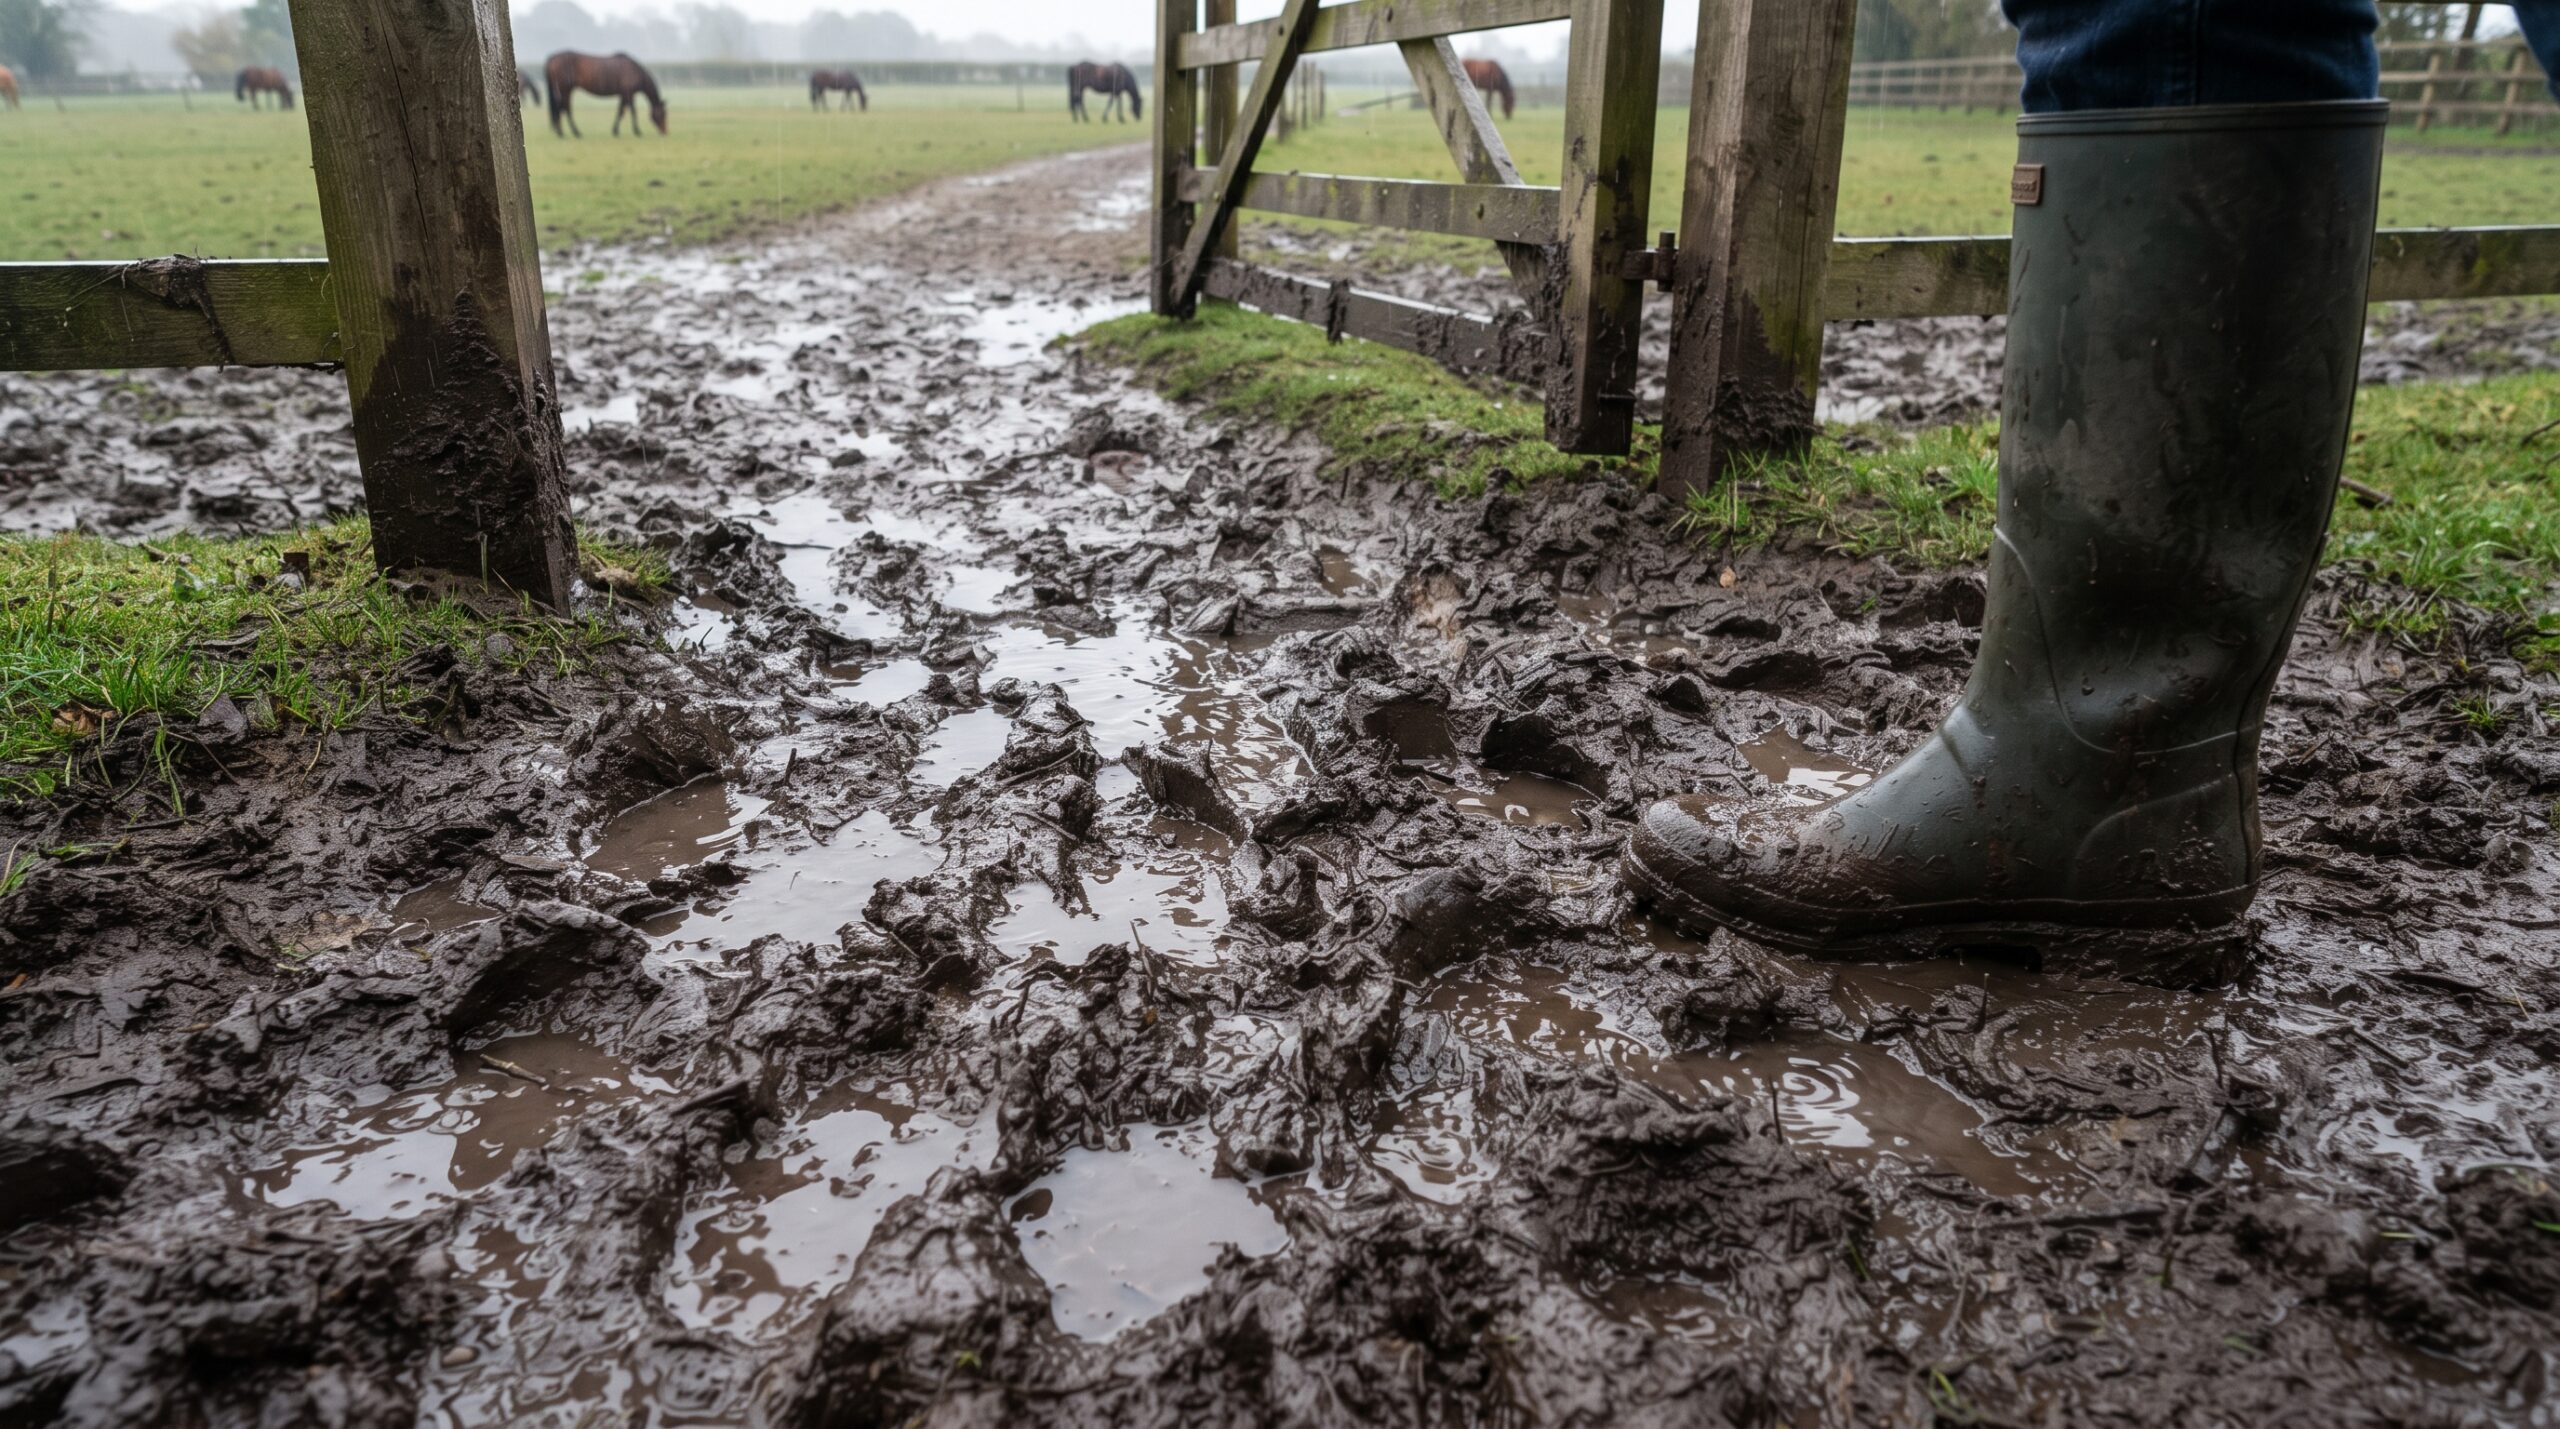
The Science of Soil Saturation & Compaction
Under normal conditions, soil contains a balanced ratio of solid particles (sand, silt, clay) and pore space filled with air and water. When continuous rain falls, water fills these air pockets. When a 1,200-pound horse steps onto this saturated ground, the sheer point-load pressure destroys the soil structure.
The weight crushes soil aggregates and pulverizes surface vegetation. Once the grass roots and top turf layer are sheared away, the underlying soil is exposed. Subsequent hoof action kneads this exposed dirt, organic waste, and standing water together, creating a thick, anaerobic slurry that cannot drain naturally.
The High-Traffic Vulnerability Zones
Not all parts of a paddock degrade at the same rate. Mud formation concentrates heavily on specific high-stress pressure points:
-
Gate Entrances & Human Pathways: The narrow bottlenecks where every horse, human, and maintenance vehicle must pass repeatedly.
-
Around Water Troughs & Automatic Drinkers: Spilled water combined with continuous trampling turns watering stations into bottomless pits.
-
Feeding Stations & Hay-Net Drop Zones: Areas where horses stand stationary for hours, grinding their hooves into the ground while dropping hay that mixes directly into the muck.
-
Shelter Overhangs & Barn Exits: Runoff zones where roof water dumps directly onto exiting traffic.
Climate and Topography Factors
Your local environment heavily dictates your mud severity. Heavy clay soils hold water like a sponge and expand significantly, taking weeks to dry out. Conversely, sandy soils drain rapidly but can shift and wash away during torrential downpours. Understanding your underlying soil profile is the first critical step toward designing an effective counter-strategy.
III. Step 1: Surface Water Management & Hydrological Control
The golden rule of paddock management is simple: You cannot fix mud until you manage the water feeding it.
Many property owners make the mistake of trying to stabilize the ground before routing water away. If you build a reinforced pad in the middle of a natural drainage basin without addressing the incoming flow, water will simply pool over or undermine your new installation.
Diverting Roof Runoff (The Hidden Culprit)
A 30×40 foot barn roof sheds thousands of gallons of water during a single heavy storm. If your shelter lacks gutters, or if downspouts empty directly into your turnout paddocks, you are artificially flooding your own land.
-
Install seamless aluminum gutters on all run-in sheds and barns.
-
Connect downspouts to flexible corrugated PVC extension pipes or bury solid PVC drainage lines to carry roof water completely away from active paddocks, daylighting the water into a safe ditch or pond.
Grading and Swales
Examine the natural slope of your land. If surrounding acreage or higher pastures slope directly toward your paddocks, you need to intercept that sheet flow.
-
Dig shallow, grass-lined or stone-filled swales (contour ditches) along the upper perimeter of your fencing.
-
These trenches capture surface runoff and guide it harmlessly around your turnout zones rather than letting it cascade through your horses’ footing.
French Drains & Perimeter Ditches
For subsurface water tables that sit perilously close to the surface, perforated French drains are essential. By digging a trench, lining it with geotextile fabric, laying a perforated pipe surrounded by clean washed gravel, and wrapping the fabric over the top, you create an underground highway that pulls excess moisture out of the surrounding soil and whisks it away.
IV. Step 2: Permanent Ground Stabilization & Advanced Footing Engineering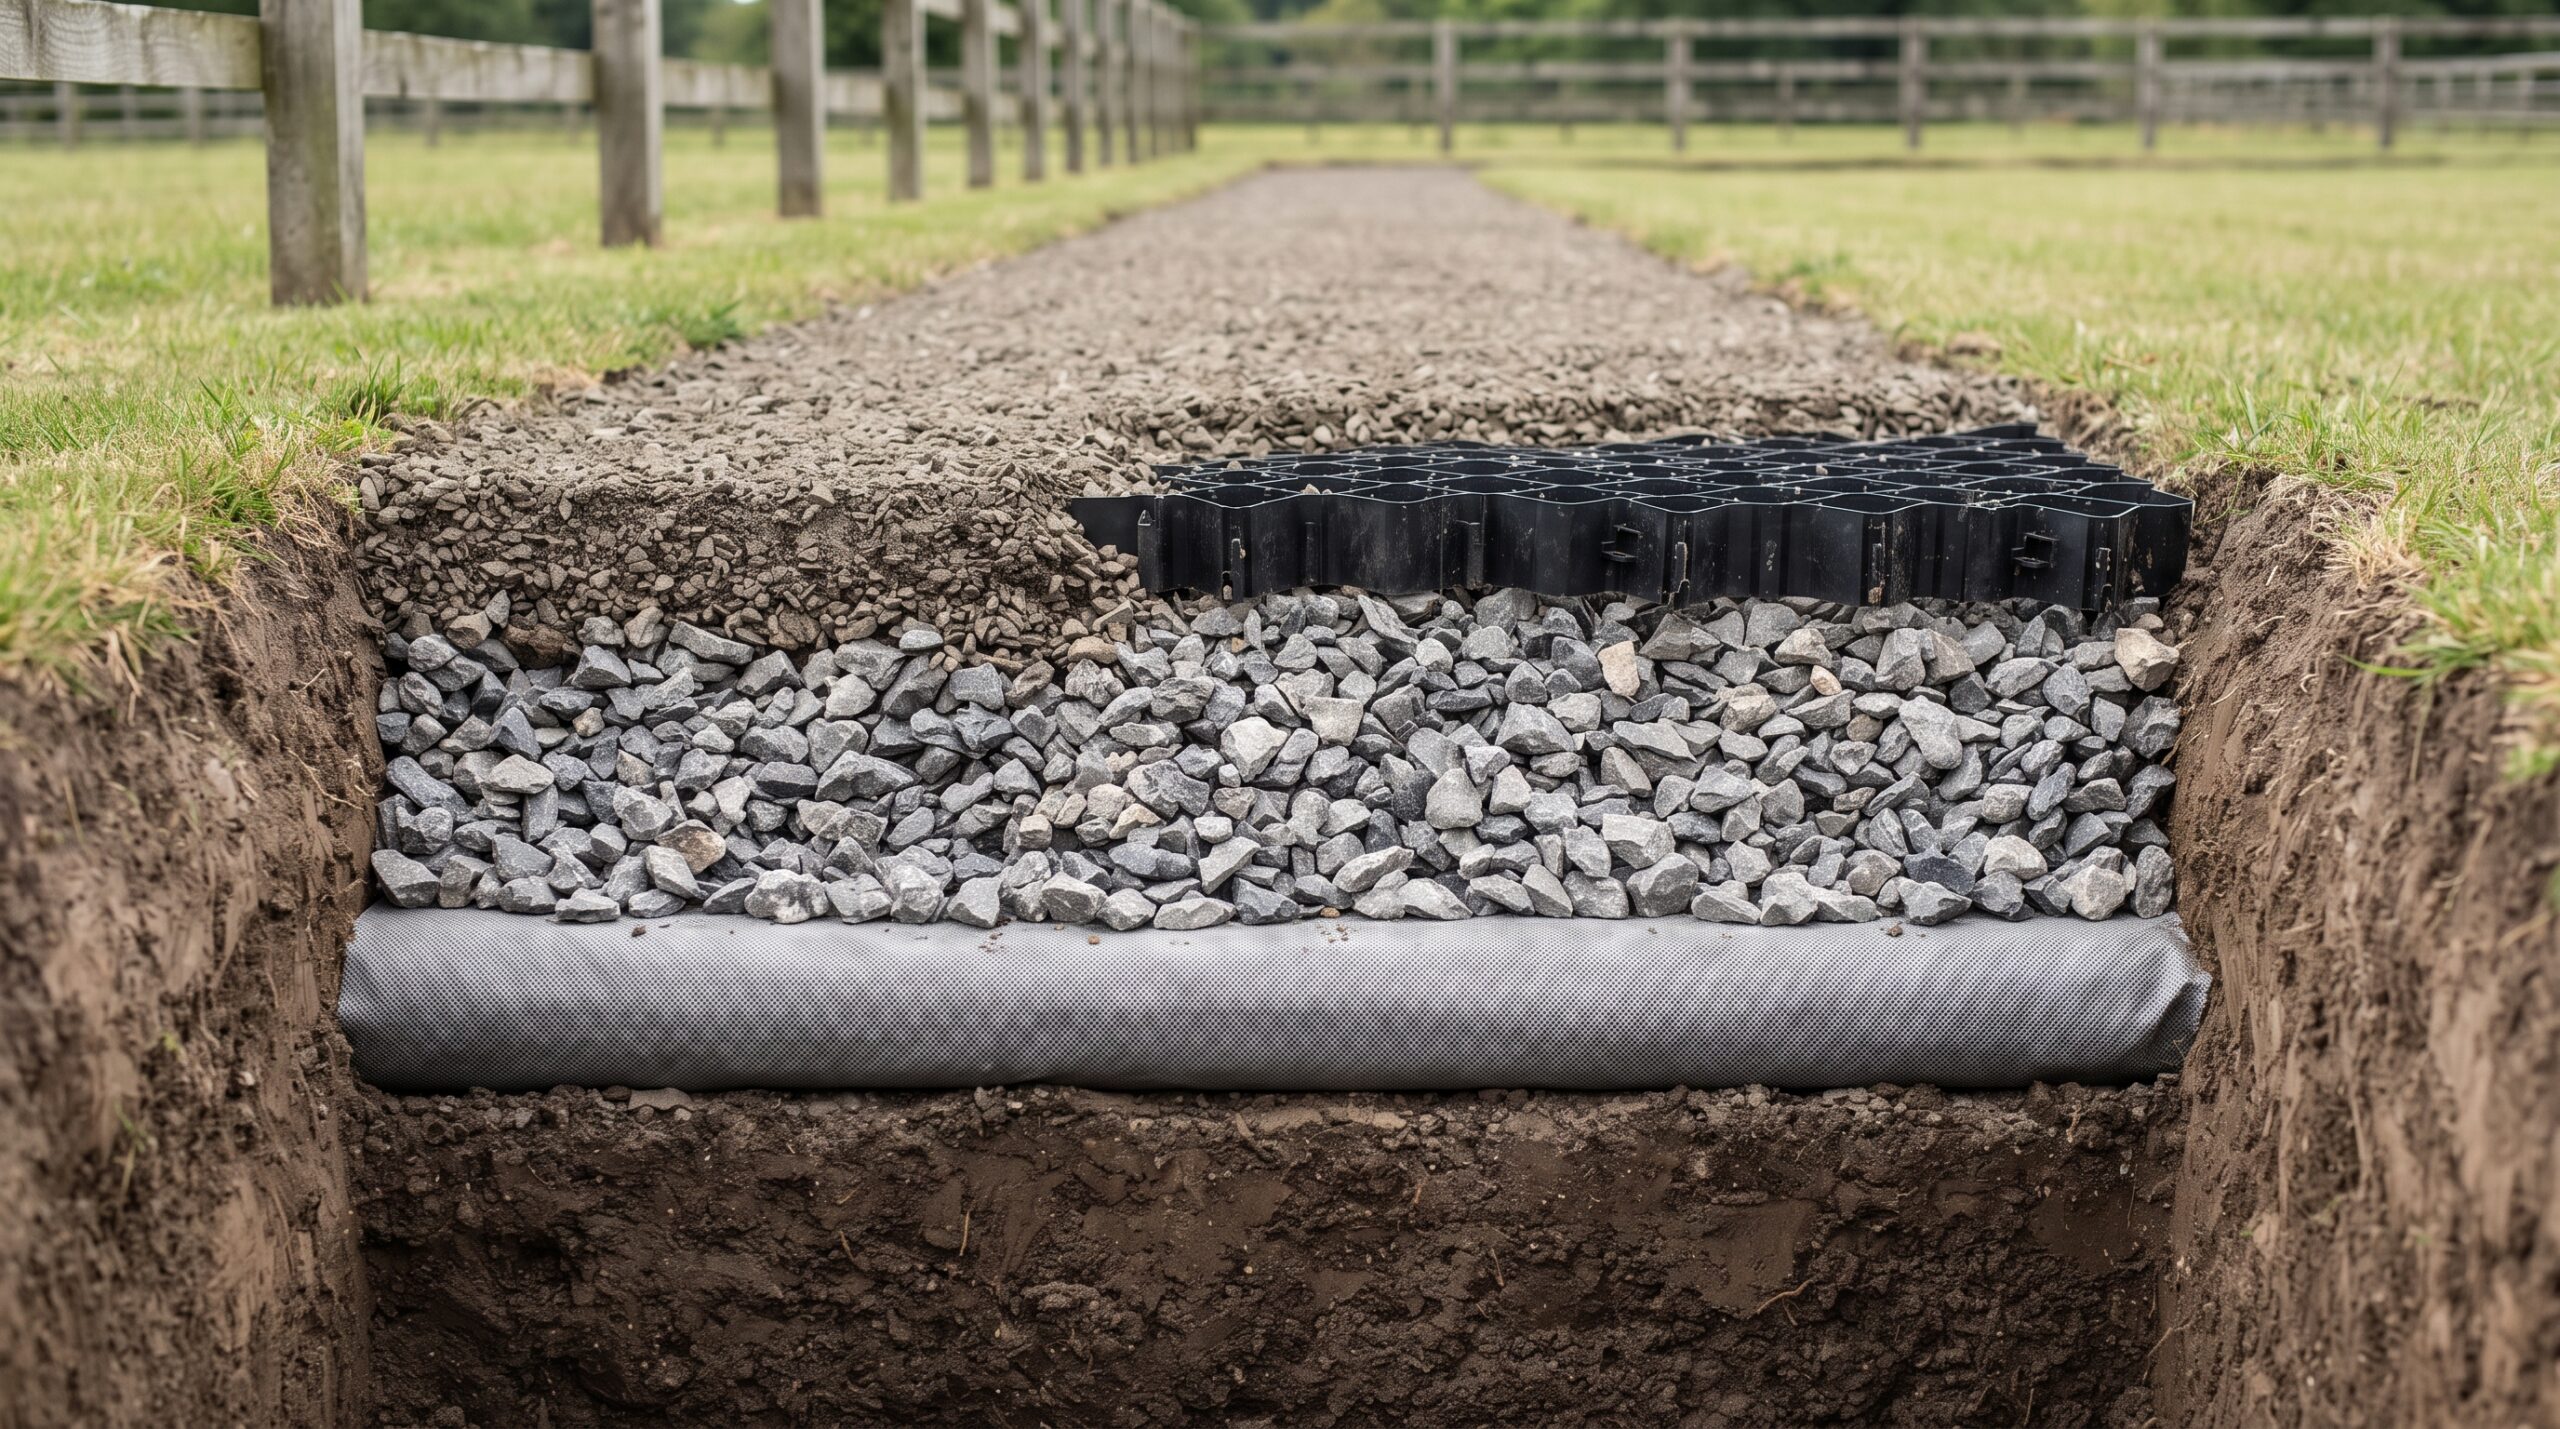
Once you have stopped incoming water from flooding your property, you can turn your attention to the ground itself. If you are tired of watching expensive rock disappear into the mud year after year, it is time to look at true engineering solutions.
The Flaw of “Just Adding Gravel”
Throwing crusher run or dense-grade gravel directly onto soft, organic mud is a financial trap. Mud is dynamic and fluid; without a separating barrier, the upward pressure of the mud and the downward weight of the horse will force the mud right up through the stones while the heavy rocks sink downward. Within months, your gravel is gone, and the mud is back.
The Geotextile Foundation (The Gold Standard)
To create a permanent, load-bearing surface, you must use a proper sub-base assembly centered around a non-woven geotextile fabric.
-
Excavation: Scrape away the top layer of organic muck down to a firm, stable sub-grade soil layer.
-
Geotextile Placement: Lay down a heavy-duty, non-woven geotextile fabric. This miracle material allows water to filter downward while completely blocking mud and soil particles from migrating upward into your clean stone.
-
Base Aggregate: Lay a 4-to-6-inch base layer of clean, angular crushed stone (such as #3 or #5 stone). Angular stones lock together to form an unyielding, weight-bearing matrix.
-
Surface Top Layer: Top the base aggregate with a 2-to-3-inch layer of finer, hoof-friendly angular material, such as agricultural limestone screenings or sharp, coarse sand. Avoid rounded river gravel, which acts like marbles and causes joint strain.
Interlocking Mud Control Grids / Paddock Slabs
For high-impact areas where excavation is difficult or maximum load distribution is required, cellular plastic mud control grids (also known as paddock slabs or geotextile grids) are revolutionary.
-
How They Work: These heavy-duty, interlocking HDPE plastic grids distribute vertical weight across a massive surface area, preventing hooves from penetrating the sub-grade.
-
Surface vs. Embedded Grids: Surface grids can often be laid down with minimal prep over heavily compacted ground, while embedded grid systems require a leveled aggregate base.
-
Cell Filling: Fill the grid cells with angular washed grit or small crushed aggregate (avoiding fine clay or dirt that packs down and blocks drainage). Once filled, the grids lock the aggregate in place, stopping migration entirely.
V. Step 3: Management Strategies for High-Traffic and Feeding Zones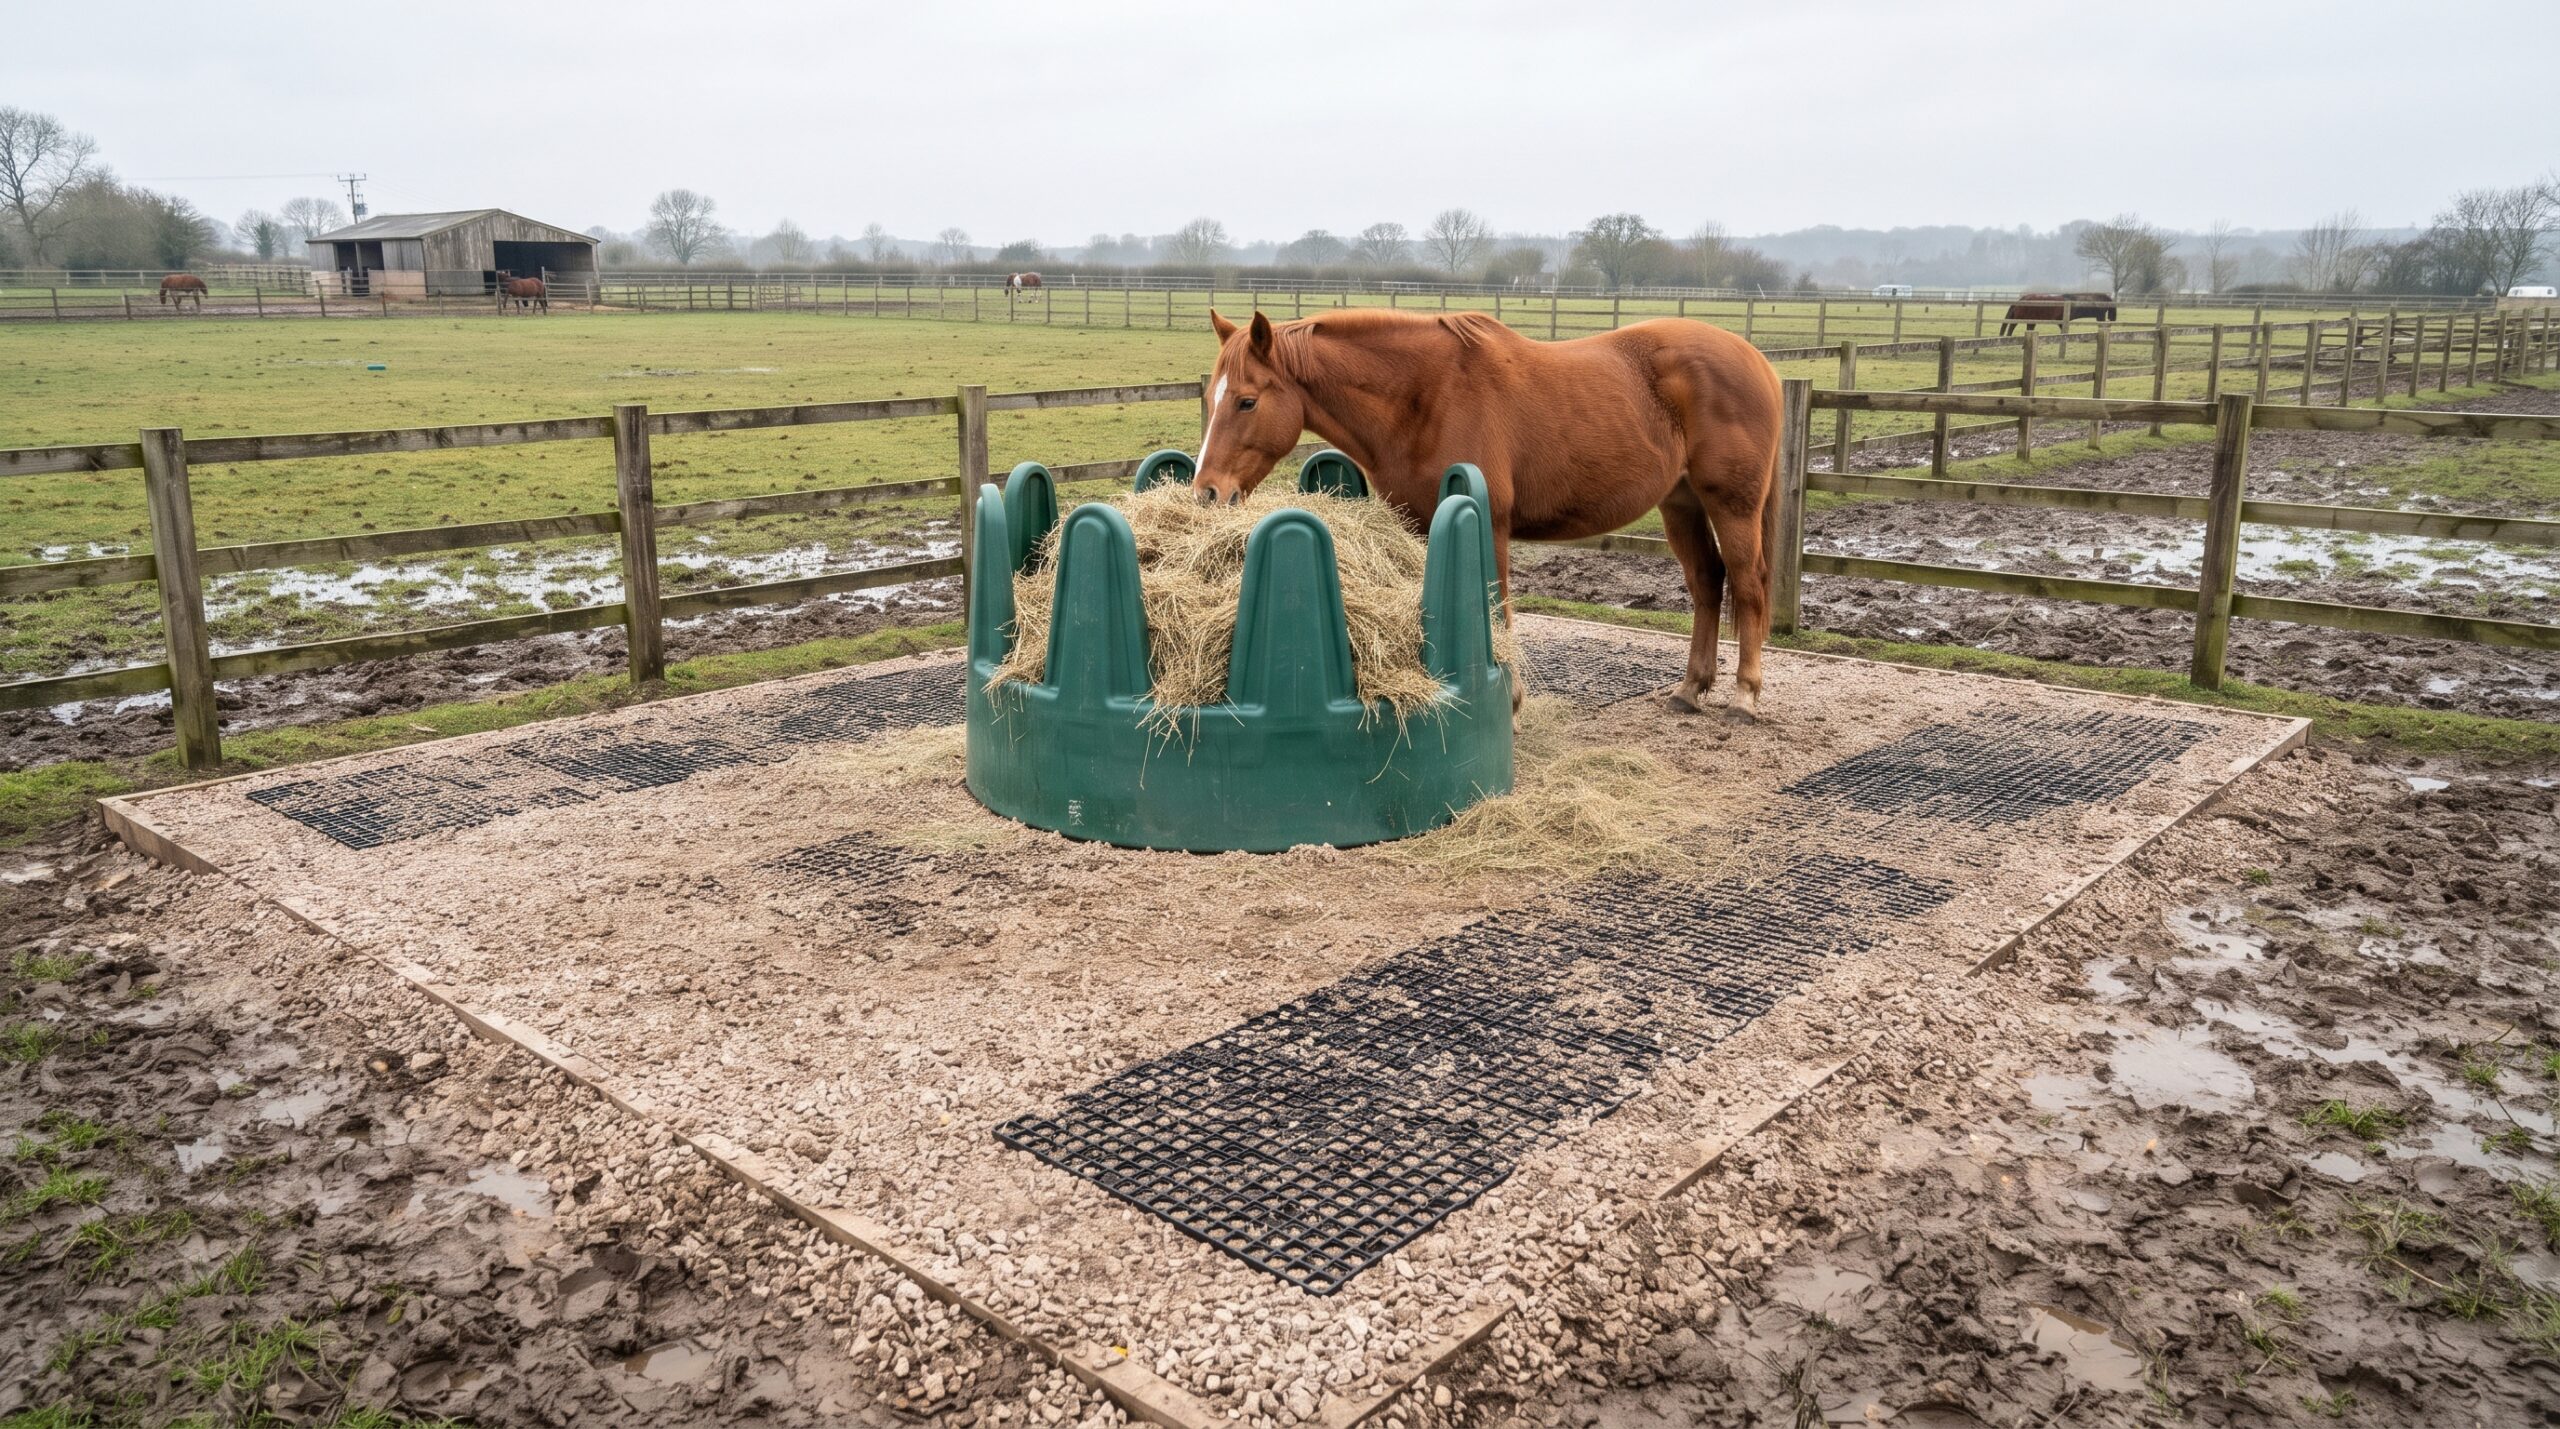
Even the best-engineered paddock will wear down prematurely if subjected to abusive management practices. Protecting high-stress zones requires thoughtful facility design and daily operational adjustments.
Relocating and Rotating High-Stress Points
-
Water Trough Placement: Move water troughs away from natural low spots and gates. Pour a small concrete apron or lay down a grid-stabilized pad around the trough perimeter so horses stand on solid footing while drinking.
-
Gate Architecture: Widen gate entryways or implement a dual-gate system to prevent horses from congregating and pawing in a single narrow pinch point.
Paddock Rest and Rotation Systems
If you have multiple turnout areas, implement a strict rotational grazing schedule. Keeping horses on a single small paddock 365 days a year guarantees the destruction of all vegetation. Subdivide your acreage into smaller sacrifice lots and rotational pastures:
-
Keep horses off pastures during saturated spring thaw periods when root systems are most fragile.
-
Allow pastures at least 30 to 60 days of recovery time between grazing cycles so grass heights can rebound to optimal levels (minimum 4 to 6 inches).
Smart Feeding Practices
Never toss round bales or loose hay directly onto muddy ground. Not only does this waste up to 40% of your expensive forage as horses trample it into the muck, but the decaying organic matter accelerates mud breakdown.
-
Use elevated, heavy-duty slow-feed hay rings placed directly on concrete aprons, rubber mats, or grid-stabilized stone pads.
VI. Equine Health & Safety: Protecting Your Horses from the Sludge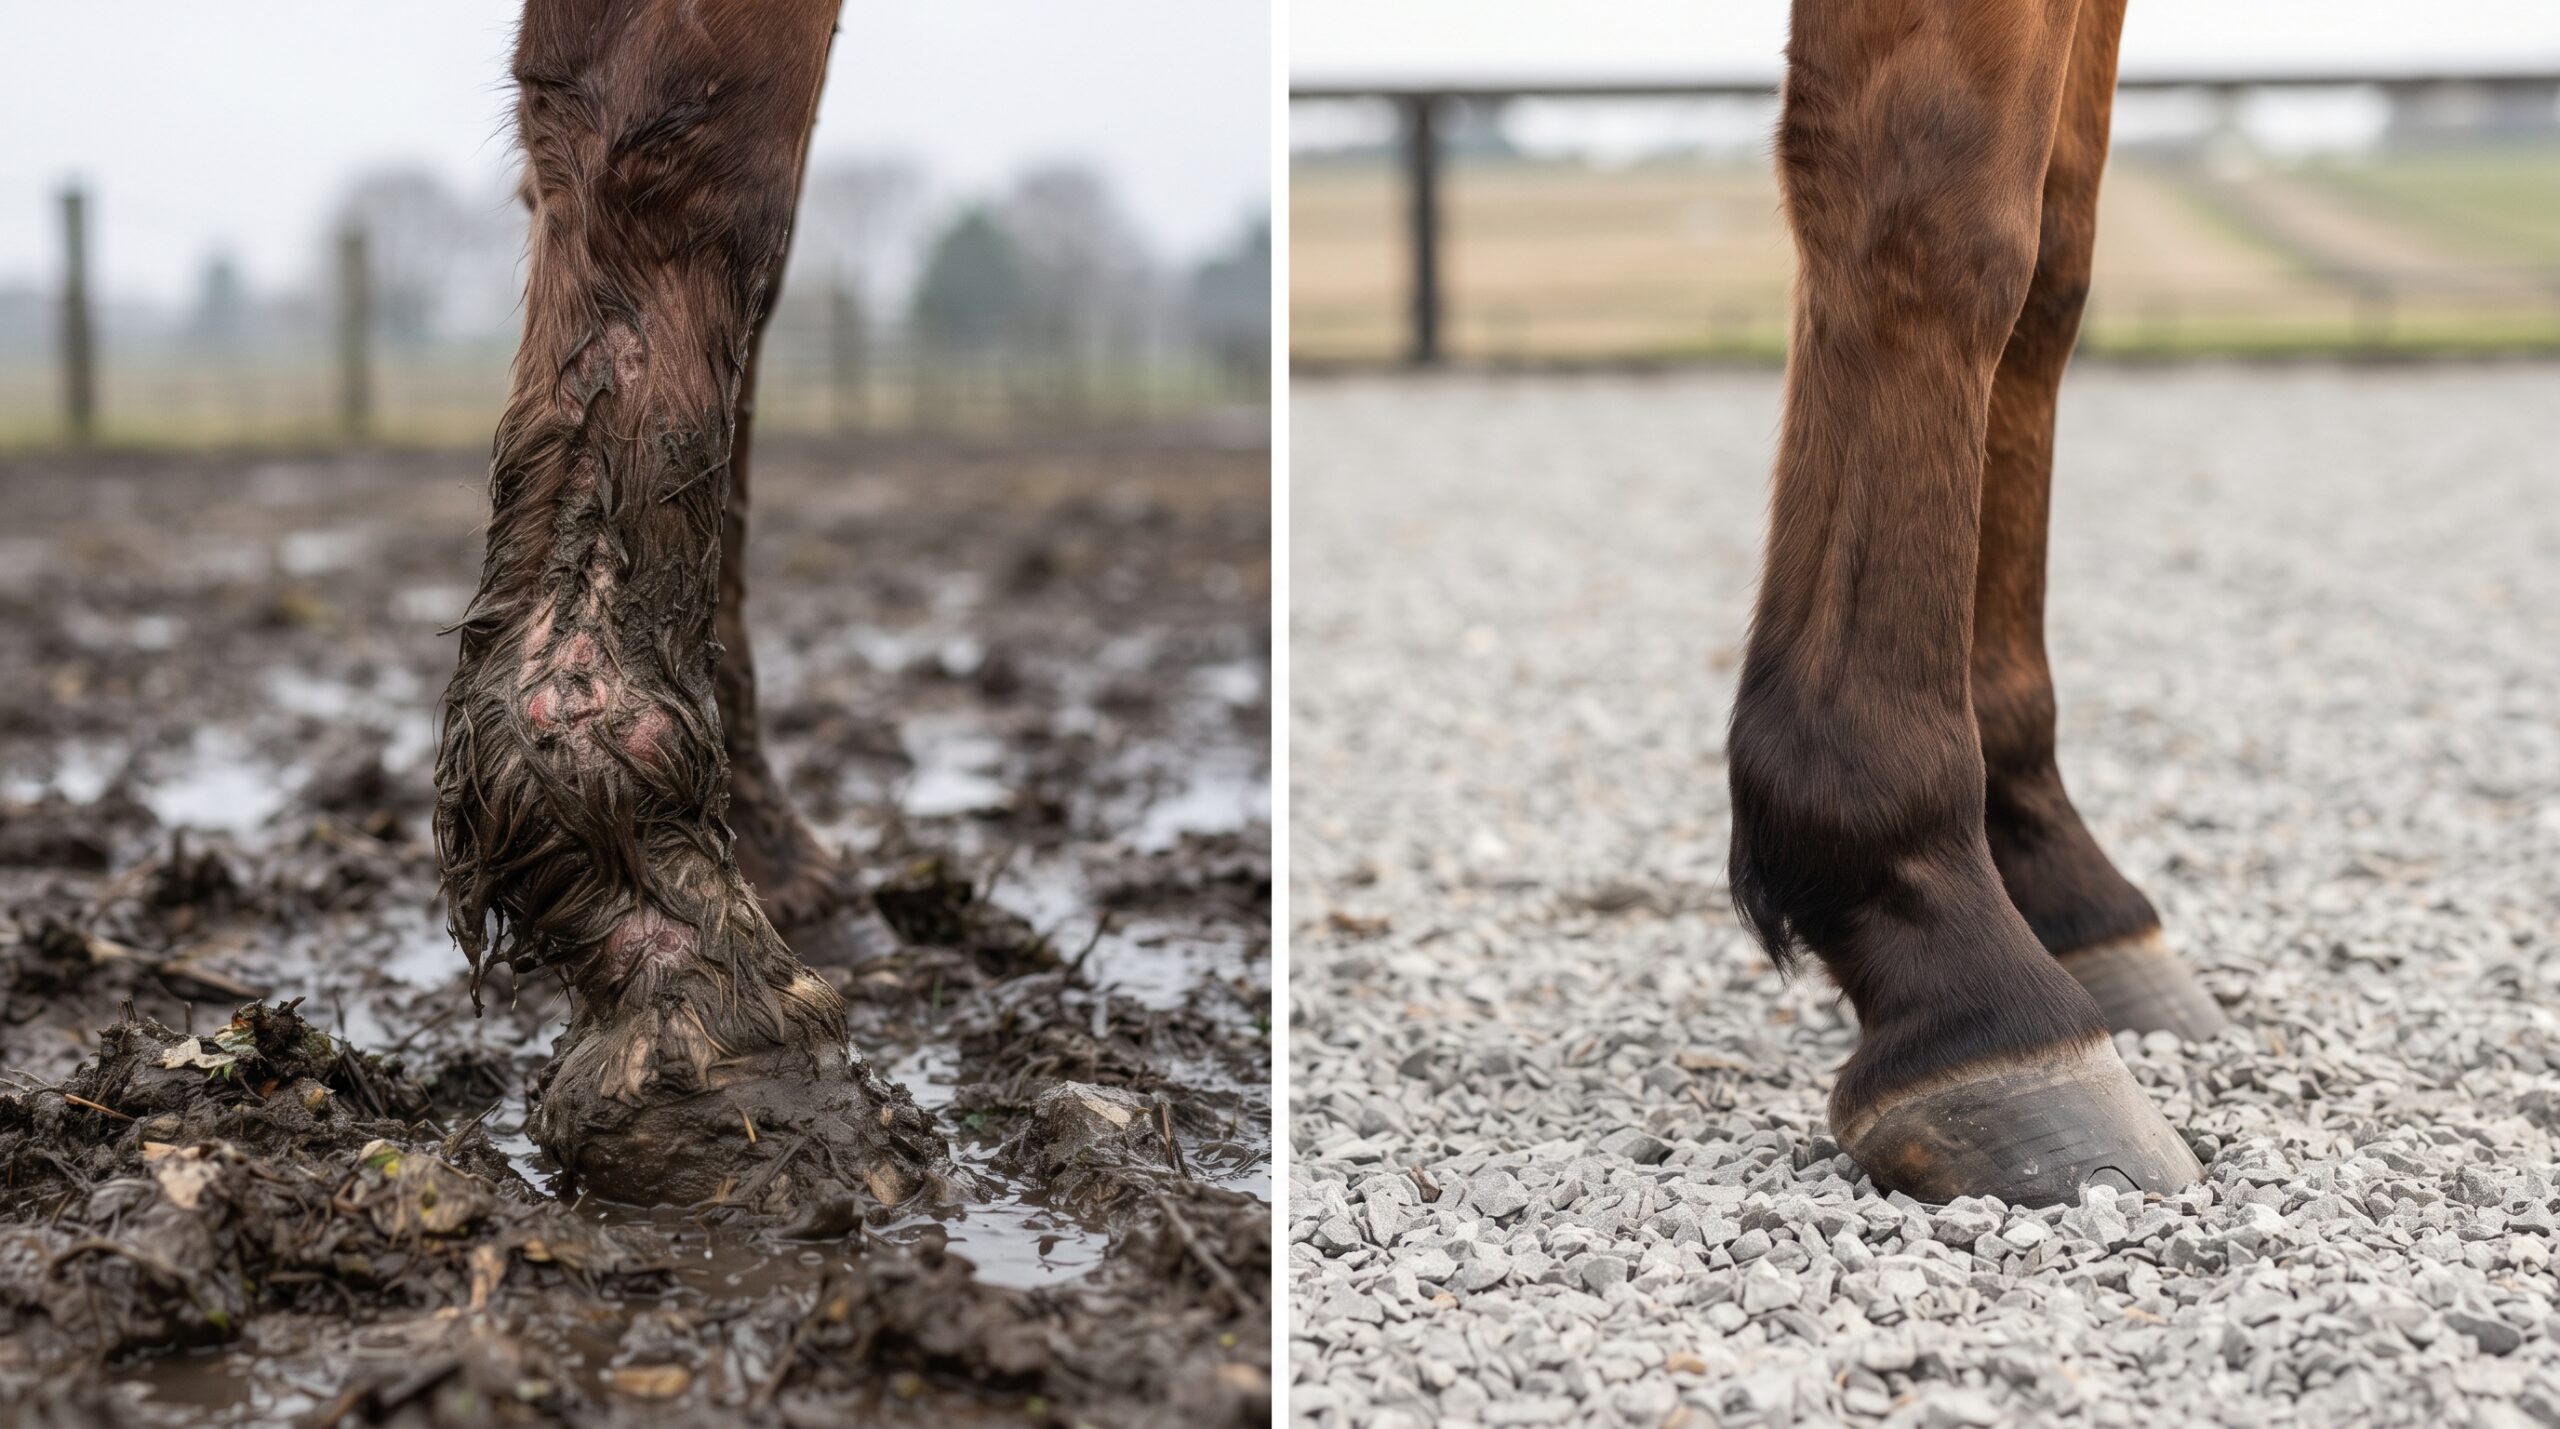
The physical toll that winter mud takes on horses is substantial. Beyond structural property concerns, proactive mud control is a vital veterinary welfare measure.
Pathological Risks of Deep Mud
-
Mud Fever (Pastern Dermatitis): Also known as scratches, this painful bacterial and fungal skin infection thrives in constant wet, muddy environments. The moisture softens the skin barrier, while abrasive mud grit creates micro-abrasions, allowing pathogens to enter.
-
Thrush and White Line Disease: When horses stand in manure-rich, anaerobic mud, the frog of the hoof is subjected to constant moisture and ammonia. This leads to thrush (a foul-smelling bacterial infection of the frog cleft) and opens the door for white line disease.
-
Joint, Tendon, and Ligament Strain: Deep, suction-heavy mud acts like a dynamic trap. When a horse lunges or plays in thick sludge, the sudden resistance places immense torsional strain on tendons, suspensory ligaments, and joints, frequently leading to soft-tissue injuries or slips.
Daily Maintenance & Hygiene Protocols
-
Inspection and Cleaning: Regularly check horse lower legs and heels during wet months. Gently wash and thoroughly dry pasterns if signs of early scaling or heat appear.
-
Proactive Manure Management: Pick up manure from high-traffic zones at least twice a week. Allowing manure to break down into the mud accelerates organic sludge creation and attracts flies and bacteria.
VII. Expert Insights & Pro-Tips Table: Choosing the Right Solution for Your Budget
To help you plan your property upgrades effectively, reference this breakdown of solutions tailored to specific paddock zones, budgets, and longevity:
VIII. Frequently Asked Questions (FAQs)
Can I put rubber mats directly on top of mud?
Laying rubber stall mats directly onto soft mud is generally a temporary fix doomed to fail. Without a solid, draining sub-base underneath, the mats will slowly sink, shift, float during heavy saturation, and trap moisture underneath, creating a breeding ground for bacteria and hoof rot. Mats work wonderfully, but only when placed over a properly prepared, compacted stone or grid foundation.
What is the best stone size for a horse paddock base?
For structural strength beneath high-traffic turnout areas, use clean, angular crushed stone—often referred to as #3 or #5 aggregate (typically 1 to 2 inches in diameter). The angular edges lock tightly together under compaction. Never use smooth, rounded river rock for a base, as it shifts constantly under a horse’s weight. Top your base stone with a finer 3/8-inch angular crushed stone or agricultural lime screenings for a comfortable surface.
How do I stop horses from tearing up newly stabilized areas?
When you complete a mud control project, the new aggregate and soil need time to settle and compact under natural weather cycles. Temporarily use electric tape or portable fencing to restrict horse access to newly laid grids or stones for at least 7 to 10 days, allowing the materials to knit together solidly before heavy hoof traffic resumes.
Is sand safe for horse footing in wet paddocks?
Coarse, sharp agricultural sand or masonry sand drains exceptionally well and makes excellent footing when installed over a geotextile fabric and stone base. However, avoid fine, dusty arena sand in low-drainage areas; when mixed with organic dirt and moisture, fine sand packs down into a slick, cement-like paste that defeats the purpose of drainage.
IX. Future-Proofing Your Farm for Every Season
Battling winter sludge can easily feel like a losing war of attrition, but with the right blend of hydrological planning, engineering, and daily management, you can completely transform your property. You do not have to overhaul your entire farm overnight. Start small: identify your single worst mud trap—whether it is the main entry gate or the area surrounding the water trough—and tackle that zone first using proper geotextile and stone or grid stabilization.
By shifting your approach from reactive mud-fighting to proactive water and soil management, you will eliminate countless hours of physical exhaustion, slash veterinary bills related to skin and hoof infections, and ensure your horses enjoy a safe, clean, and comfortable environment 365 days a year.